😖 @ 📃! This post contains unpleasant images. If you don’t wish to see them, please view this page with a text browser or a text mode plugin of your browser.
Rationale
Why?
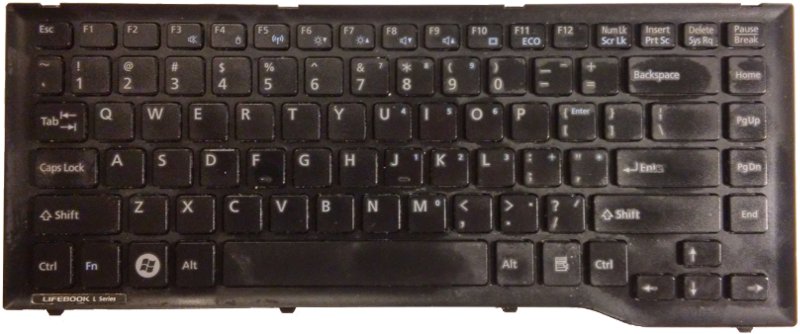
My Fujitsu LH532 has been serving me well as my production machine for almost six years.
The keyboard was quite dirty: it’s full of hair and dandruff. I had to clean it for personal hygiene.

Who?
Paying for IT technicians isn’t cost effective. A thorough keyboard cleaning demands some skills and this takes several hours. Consequently, the manpower cost is going to surpass the cost of a new keyboard. Apart from this, the reasons for cleaning my keyboard by myself is three-pronged.
- ecological: avoid e-waste
- economical:
- save money
- If the IT technician accidentally broke a tiny part of your keyboard, they would have to compensate for your loss apart from getting no wages. The risk of breaking things would outweight the profit.
- emotioinal: one gradually attaches emotions to something that (s)he has been using for years.
Detached keyboard from laptop
Always switch off and remove before any repairing work .
Goal
To separate from for cleaning.
No screws holding keyboard in place
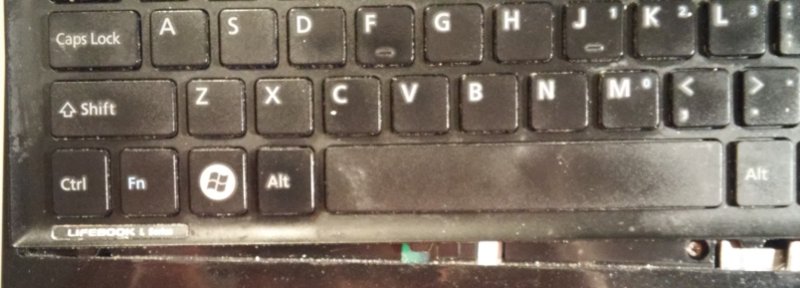
I tried prying out the keyboard from the top left-hand corner with my finest flathead screw.
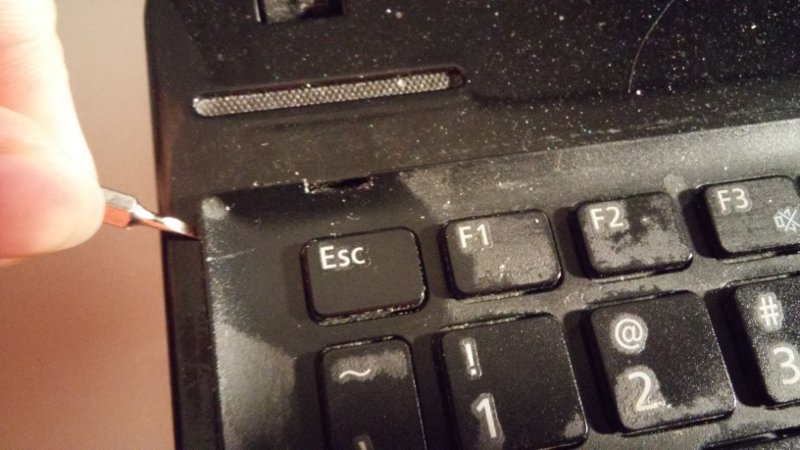
Use another long thin flat tool to touch the clip (in the four holes above the row of function keys).
However, having received so much resistance from the bottom right-hand corner, I suspected that the keyboard had been screwed onto the laptop. Therefore, I unscrewed the laptop’s bottom lid. (This turns out to be unnecessary.)
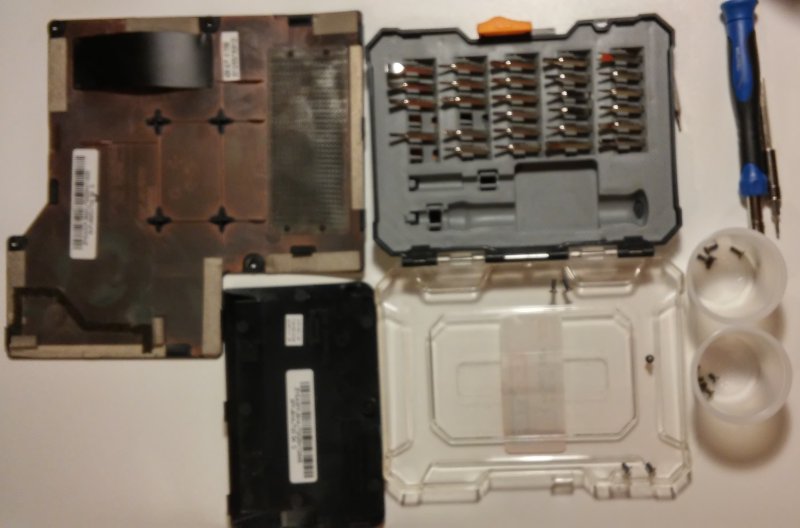
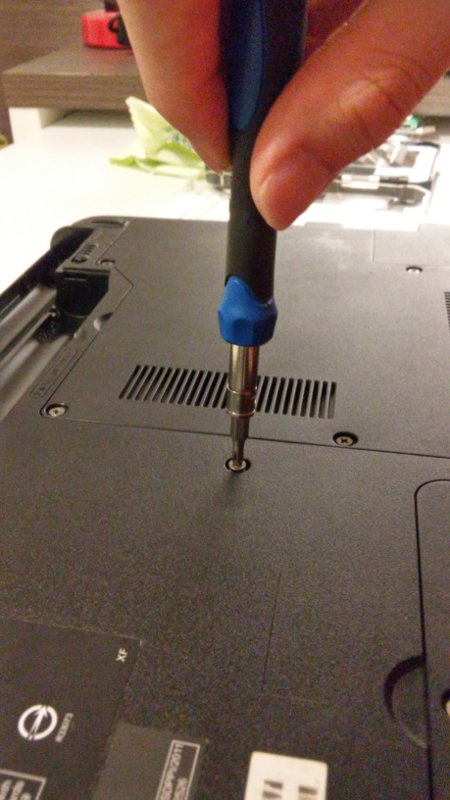
Unscrewing the bottom lid
Top left: lid for fan and CPU maintenance; bottom left: lid for hard disk; middle: my precision screwdriver set; right: screws sorted according to sizes and positions
Some safety precautions while operating with screwdrivers:
- Always prepare some small containers to sort screws according to their sizes and functions.
- From Geekerwan’s video, one should install a part into the machine by breaking the entire screwing process into “multiple turns of slight rotations”: rotate each screw slightly with the screwdriver each time, then move to the next screw.
- If your screwdriver’s head isn’t magnetic, use your dominant hand to hold the screwdriver’s handle, and use your remaining hand to hold the screw.
Disconnected keyboard from laptop
Due to the absence of reliable repair guides, I didn’t dare to remove the lid. Instead, I resumed the process of detaching the keyboard. I started with slight forces, and gently increased the force until that it’s enough to detach the keyboard.
After that, the keyboard remained connected to the laptop with a cord. The cord was hidden underneath: it couldn’t be seen while one was prying the keyboard out. That’s why the keyboard deserved to be treated gently.
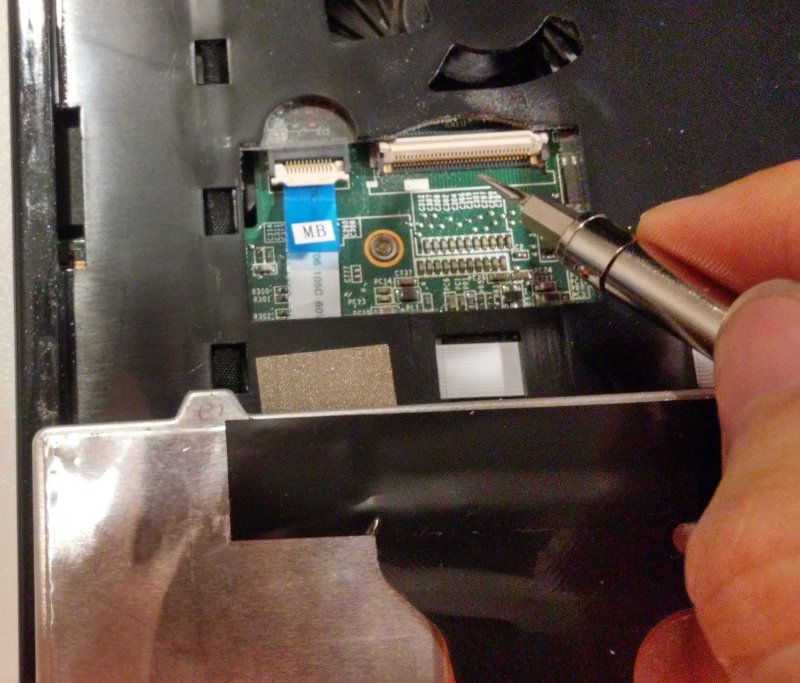
At this stage, I realised my wrong guess: no screw was used to fix the keyboard onto the laptop. Since the keyboard was attached to the laptop by the cord only, it’s better to disconnect the cord first.

In some demo videos, the slot released itself with a slight push at one of the ends of the slot using a screwdriver. Nonetheless, I didn’t manage to apply this skill to my laptop. Instead, I opened the slot from the middle with my finger. I was careful enough not to touch any surrounding sensitive parts.
Screwed the lid back
Key removal and cleaning
When a tiny part falls on the ground, pick it up immediately to avoid accidental damages or loss.
Key removal
To avoid any damage on the silicon cap under each key, don’t insert the screwdrivers too deep into the cavity under each key.
- Normal size keys were relatively easy to remove.
- Place one screwdriver on the top side and another screwdriver at the bottom on the right side.
- Pry them up gently. The key should pop out. They sometimes jumped far away so picking them up is a bit tedious.
- Small keys required more care.
- Start prying from either one of the longer sides.
- Idem for another longer side.
- Bottom row keys (except space bar): similar to normal size keys
- Remaining longer keys: they came with metal bars, which evenly distribute pressure to the entire key, so watching some demo videos can help, even though the work had been done on other models. Except the space bar, the metal bar underneath is U-shaped. As a result, start from the top side before the bottom ide.
Hinge removal
-
Hinges for normal size keys were relatively easy to remove.
-
Hinges for small keys required more care.
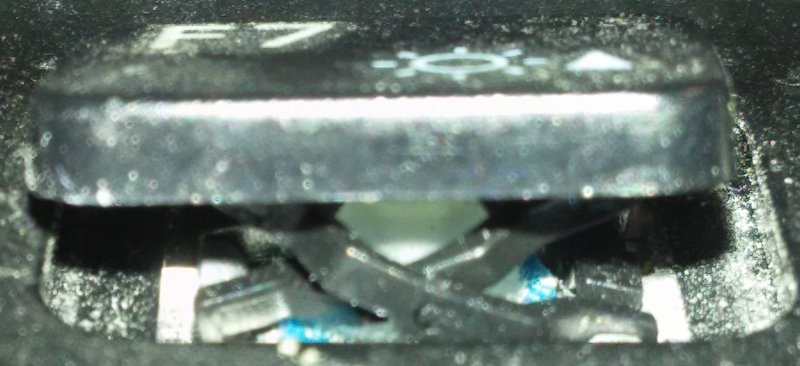
At first, I didn’t know how to handle them. Already worked for two hours, I felt tired and pried F7 key hard.
What’s worse, I broke F5 key’s hinge.
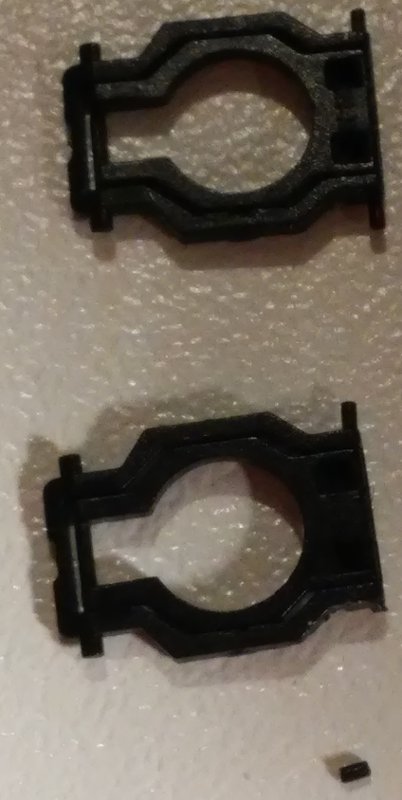
Having experimented on several hinges for small keys, I finally found a proper way to remove it.
- Observations
- Prying from the left-hand side was impossible: the metal hook on the left-hand side held one component of the hinge.
- Prying from the right-hand side was also impossible: the metal hooks on the right-hand side held another component of the hinge.
- The middle part is elastic and flexible.
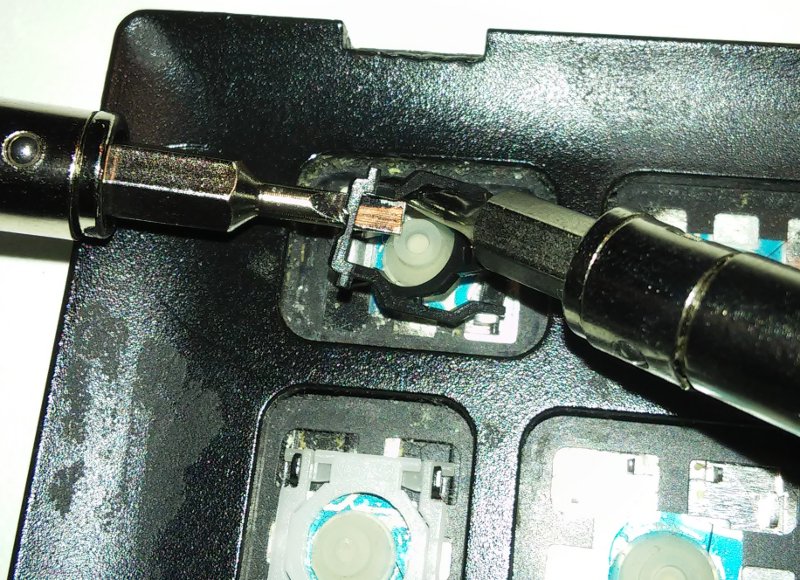
- Steps
- Lift up the hinge with a flathead screwdriver.
- Place another screwdriver adjacent to either one of the two joints to keep the hinge lifted up.
- Slightly twist the screwdriver in step 2 to release the joint.
- Repeat steps 2–3 for another joint.
- With the joints detached, the two components of the hinge could be easily removed.
- Observations
Keyboard cleaning
Without compressed air, I tried my best to get rid of the dandruff by brushing the keyboard with an old toothbrush and by turning the keyboard upside down. I removed the hair by hand. It took me one and a half hour to take away most of them.
Cleaned the keys and hinges
Some safety precautions:
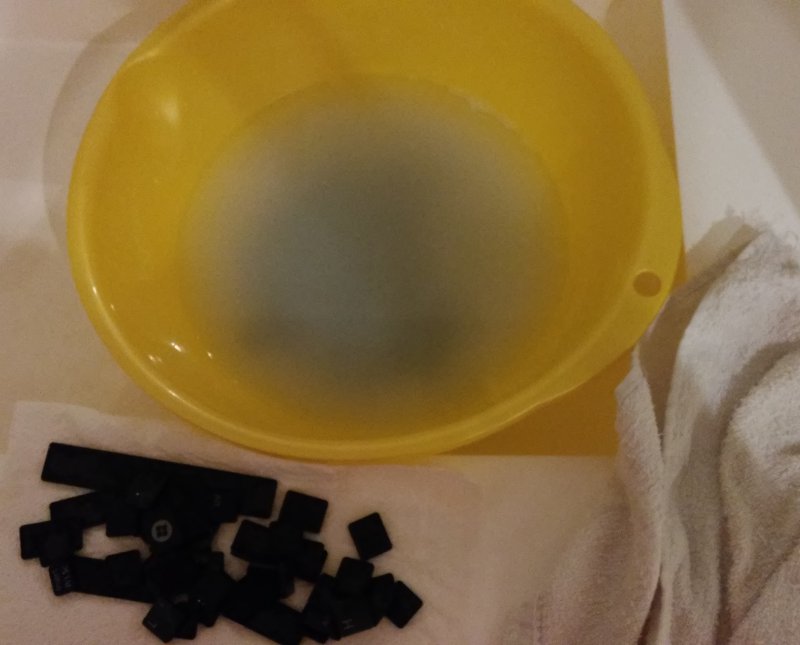
- Prepare
- a plastic basin to hold the solution
- a container to hold the keys and hinges
- a towel to dry the detachable parts
- Always put your parts into/onto one of these three tools to avoid losing them.
I immersed all keys and all hinges into a cleaning powder solution for another one and a half hour in order to remove the grease on the surfaces of the keys and to kill the microorganisms on the hinges. Then I transferred these removable parts onto one towel before replacing the solution with water, which rinsed off the remaining solution on them. They were eventually dried on another towel.
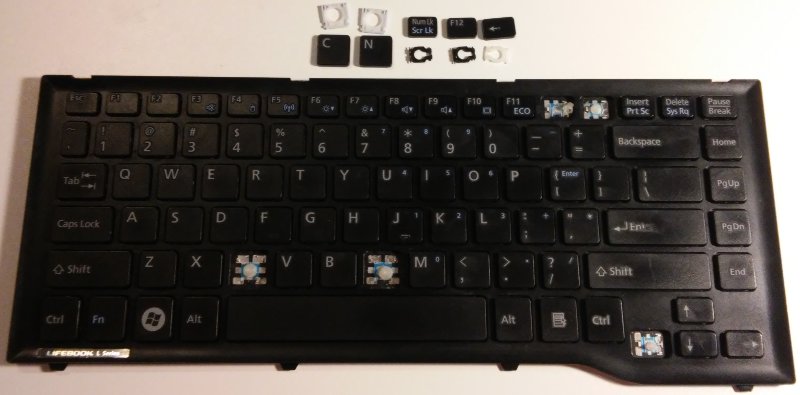
After cleaning
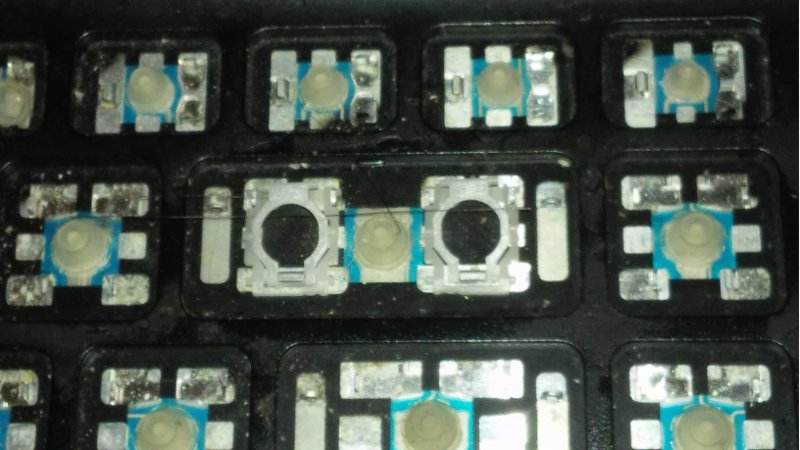
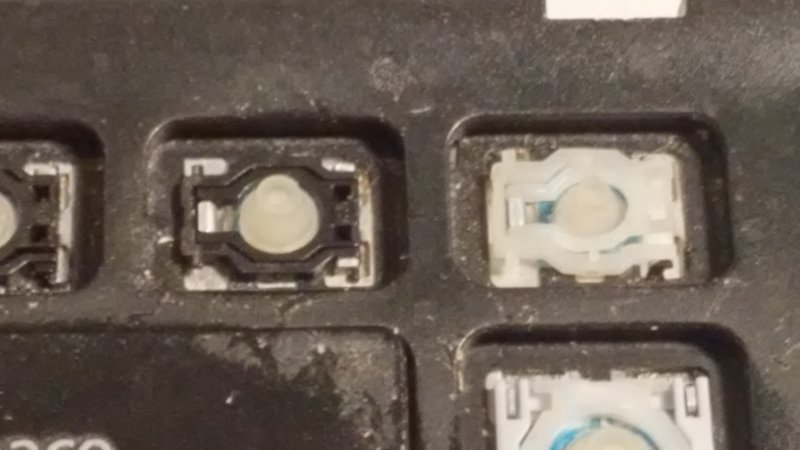
Unaware of the mechanism of the keyboard, I had detached five silicon caps.
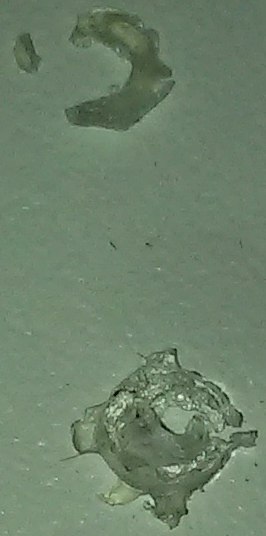
Detached silicon caps after cleaning
I had detached them by accident during key removal and cleaning.
Stuck detached silicon caps back
Some safety precautions while operating with super glue:
- Work in a well-ventilated area to dilute the smell of super glue.
- Wear a pair of gloves to avoid super glue from sticking your hands.
- Close the lid of the super glue when it isn’t in use to prevent the super glue from drying.
- Squeeze a little super glue onto a sheet of paper. Gently dip the surface which you want to stick onto the super glue. Bear in mind that less is more.
- Stick the surface in step 4 onto another one. Try to get the position right with one stroke.
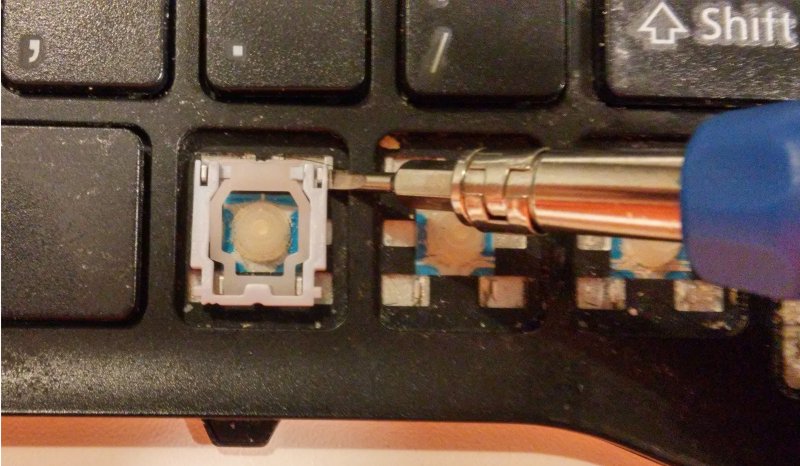
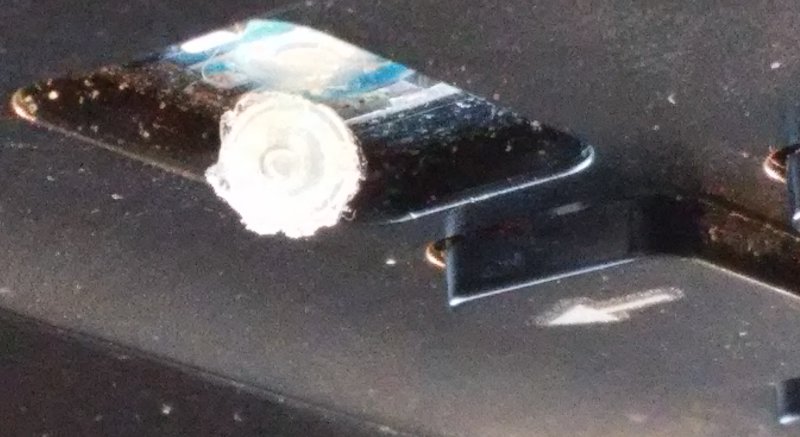
I applied super glue to stuck each of them to the dotted circle. After overnight working, I was so exhausted that I added too much super glue to the buttons N and ←. As a result, these two keys didn’t work well when I booted into GRUB’s CLI.
Some stuck caps suck
I detached the silicon cap for these two keys again. Since they had been stuck to the keyboard with super glue, I used a flathead screwdriver to gently remove them. This was suboptimal, but I thought that’s better than passing any organic solvent on the surface of the keyboard.
The layer of super glue between the silicon cap and the keyboard sensor stopped the later from detecting pressure on the key. To restore the function of the buttons N and ←, I removed that layer of super glue.
Finally the N key was fixed: no noticeable difference from other normal size keys could be observed, but my fix for the ← key was suboptimal: this key would still respond to a press, but its silicon cap lost part of its elasticity.
An outing in Le Marais district
Two days later, I walked on the streets in Le Marais situated in the fourth arrondissement at Paris to take a break from my technical work. I passed through le Temple du Marais.

I was surprised that my church was going green. Renewing an old keyboard is certainly a way to do what they preach.
You may see original photos (with higher resolution licensed under CC-BY) in my Flickr album.